I recommend a two-tier round cake with 10-inch and 8-inch layers to serve your 50 guests comfortably. This combination yields 50 to 60 wedding-sized portions when sliced 1 inch by 2 inches, providing a small buffer for unexpected plus-ones.
If you’re offering multiple desserts, you could scale down slightly since guests tend to sample everything. I will walk you through portion styles, dietary needs, and cutting tips so you can order with complete confidence.
What Size Cake Serves 50 Guests? The Quick Answer
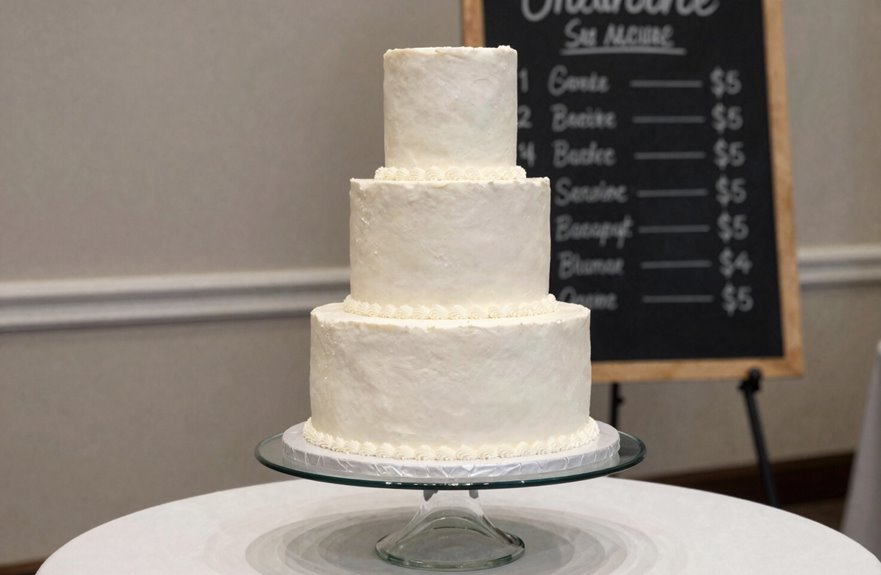
How do you size up a cake for 50 people? I typically reach for two wedding cake layers—an 8″ and 10″ combo—which yields roughly 40–60 servings depending on how you slice.
That range helps you meet your needs.
If you’re considering cake sizes with more flair, a 6″, 8″, and 10″ trio serves 75–85. I recommend trimming counts with slender cuts to avoid waste.
Smaller pairings like 5″ and 7″ fall short at 30–35 portions, so adding that third tier is advisable to ensure everyone is served.
Square tiers provide extra pieces compared to rounds, making it easier to hit 50 servings with less height. Wedding-portion cuts, about 1″ by 2″, stretch each cake further, keeping your celebration well-supplied and beautifully styled.
Finger Portions or Dessert Portions: Which Do You Need?
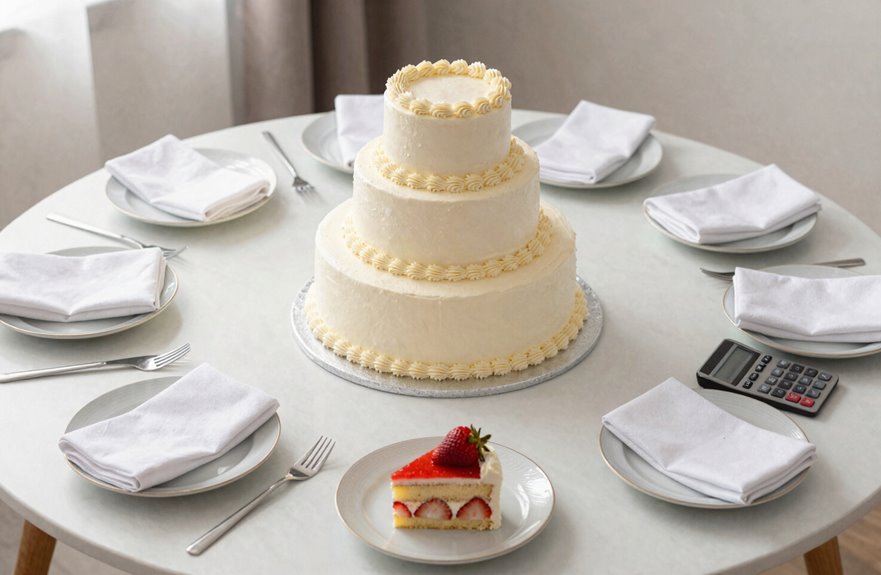
Why does portion size matter? It determines whether your guests feel satisfied or shortchanged, and I aim to help you get it right.
I’ve noticed finger portions—those neat 1 x 1 x 4 inch slices with three layers and filling—work beautifully when offering treats alongside your cake. They are modest, elegant, and keep cake servings manageable without overwhelming anyone.
When cake stands alone as the star, I reach for dessert portions. At 2 x 1 x 4 inches, these generous slices provide a full, indulgent experience.
For fifty guests, I am weighing this choice carefully. Standard guidelines suggest 1 to 2 inch wide slices from 4 to 5 inch tall tiers, with a 12 inch cake yielding about 50 servings.
I plan for 90% of guests receiving slices, adjusting for dietary needs and desired leftovers. Your tier selection, perhaps 10 inch and 8 inch or 6 inch and 8 inch, depends entirely on this portion decision.
Is Cake Your Only Dessert or One of Many?
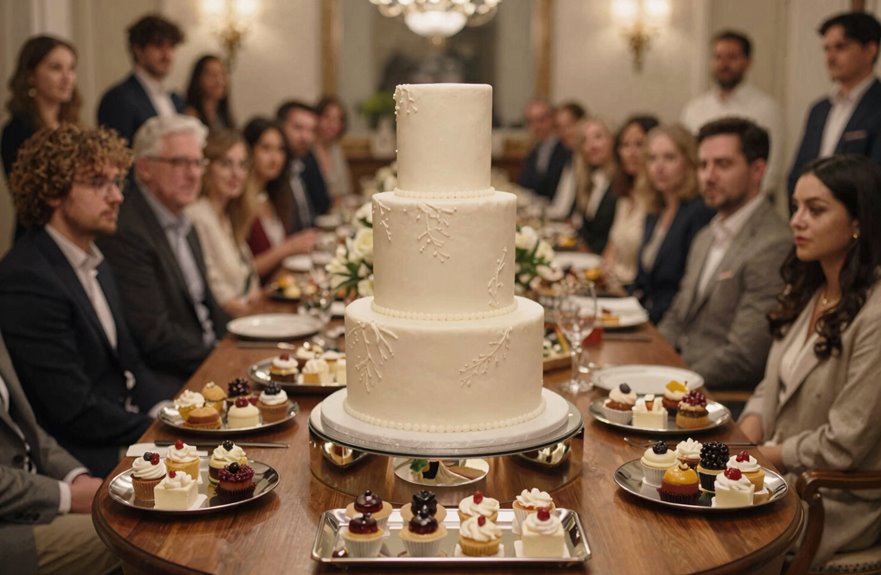
I’ll help you determine whether you’re serving dessert-only portions or making multi-dessert adjustments. If cake stands alone, I plan to serve standard 1 x 2 inch slices for all fifty guests.
When offering multiple sweets, I will shrink those portions and build a dessert table with mini treats so the cake doesn’t bear the entire responsibility.
Dessert-Only Portions
Whether you’re hosting a dinner party or planning a milestone celebration, I often consider the role of the cake. When dessert-only portions are involved, I view the cake as the focal point.
In these situations, I determine my serving size using wedding servings, which are roughly 1 x 2 inches per slice. This approach allows me to maximize what I offer while ensuring each guest is satisfied.
Dessert-only portions allow for larger tiers. A 10″ plus 8″ configuration provides 50–60 servings and creates that centerpiece moment many desire.
The context of dessert time influences my cuts; when the cake is the sole item, I tend to be generous. For vegan or gluten-free guests, I adjust my counts and provide alternatives to maintain a positive experience for everyone.
Multi-Dessert Adjustments
How does your dessert lineup look? If you’re planning multiple desserts, you don’t need a massive cake.
When cake shares the spotlight with a dessert table featuring mini treats, I scale down my portions. I ask for a finger portion (1″ x 1″ x 4″) or smaller wedding cut (1″ x 2″) instead of standard slices.
This stretches my cake servings effectively.
For fifty guests with variety, I target roughly 50–60 total dessert servings. A 6″ and 8″ tier combo provides about 40–48 cake slices, and my dessert table fills the gap with cookies, cupcakes, or donuts.
Everyone has options.
I always communicate with my cake designer about the cake’s role in my spread, whether it’s the main attraction or a supporting player.
This conversation helps adjust sizing guidance, ensuring my portions are perfect and my guests are satisfied.
Why You Only Need Cake for 90% of Your Guest List
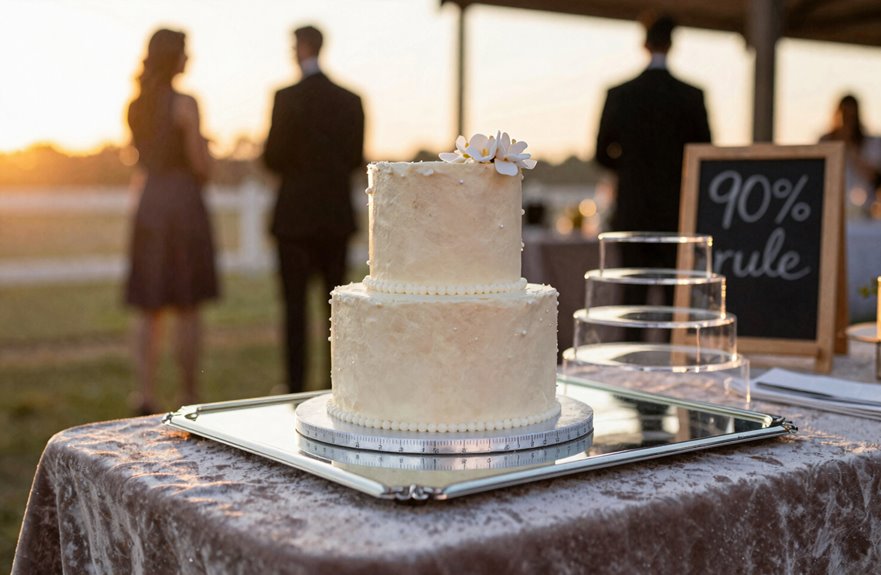
Why do so few hosts realize they’re ordering cake for guests who won’t touch it? I learned this lesson while planning my own celebration.
Some guests leave early, others skip dessert entirely, and a few simply don’t eat cake. This is why I believe in serving 90% of guests rather than the full headcount.
Getting your cake portion right starts with careful guest list planning. For a fifty-person celebration, I order for forty-five.
At an eighty-guest event, I would choose a three-tier cake serving around seventy. This approach allows for a small cushion without creating waste.
Serving time also matters. Dessert portions work well for seated meals, while finger portions suit evening receptions.
When I consult with my cake designer, I share these details to balance my aesthetic vision with realistic numbers that are practical.
Plan for Dietary Restrictions and Alternative Desserts
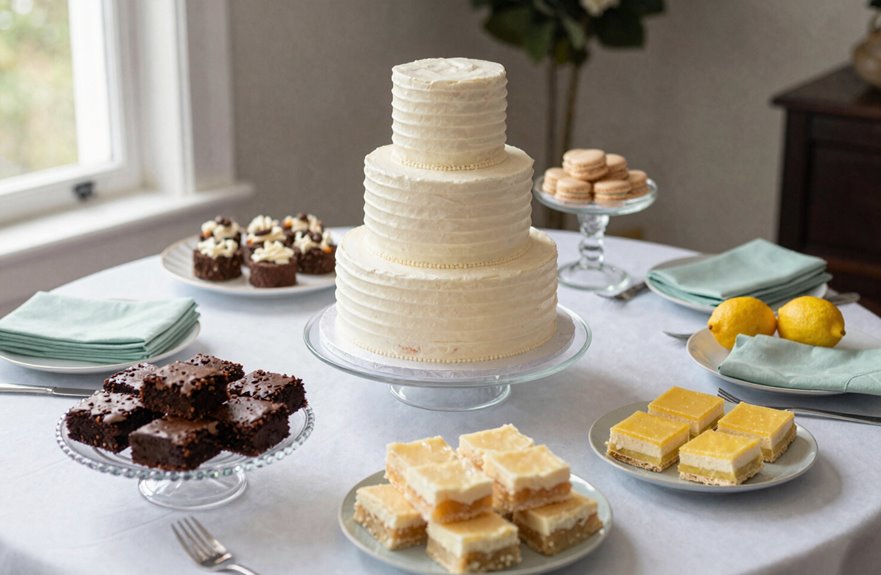
I will adjust my cake order to include vegan or gluten-free options for guests with dietary restrictions, and I will ask my baker which slices meet specific needs.
I am also planning a dessert table with labeled alternatives like fruit and nut-free cookies so everyone can find something safe to enjoy.
By confirming serving sizes and cross-contamination protocols, I will ensure my 50–60 cake portions work alongside these extras without excluding anyone.
Dietary Accommodations
What happens when I’ve planned the perfect cake, only to realize half my guests can’t eat it? I estimate dietary needs early and build accommodations into my plan from the start.
I ensure everyone’s included by:
- Labeling gluten-free and vegan options clearly so guests feel welcome, not singled out.
- Adjusting portions with smaller cake slices for guests with restrictions to stretch my servings.
- Communicating needs to my baker and caterer well ahead so separate storage and prep happens.
I want every guest to belong at my table. This means counting vegan and gluten-free needs into my fifty-guest total, rather than treating them as afterthoughts.
When I plan portions with restrictions in mind, I protect the experience I’ve promised. This ensures that no one leaves hungry or feeling excluded.
Dessert Alternatives
How can I keep my dessert table exciting without overshadowing the main cake? I create a spread where everyone finds something welcoming.
When planning dessert alternatives, I complement my centerpiece instead of diminishing it. My 8″ and 6″ or 10″ and 8″ tier combo yields 40–60 servings, and I enhance this with 3–4 mini treats per guest, such as cookies, cupcakes, and macarons.
These bite-sized portions allow me to cut cake slices smaller—just 2×1 inches—stretching my servings while ensuring no one feels shortchanged.
Sheet cakes are kept in the kitchen, ready to fill gaps and ensure that everyone leaves satisfied. I label everything clearly to indicate dietary options—vegan, gluten-free, nut-free—so every guest feels included.
Together, we celebrate with a variety of sweet options for all.
Single Tier or Tiered: What Looks Right for 50 Guests?

When deciding between a single tier or tiered cake for 50 guests, it’s important to consider the guest count and the atmosphere you want to create for your celebration.
- A 6″–8″ single tier provides 24–60 wedding servings, offering an intimate and simple option.
- Cake tiers in a 6″/8″/10″ trio yield 75–85 servings, ensuring everyone is included and allowing for potential leftovers.
- Adding a small top tier to a single base can enhance the centerpiece effect without being excessive.
Whether you prefer a cozy gathering or a more striking display, there is a cake shape that suits your needs. Square tiers can also extend portions if you’re mindful of every slice.
How Tall Should Your Cake Tiers Be?
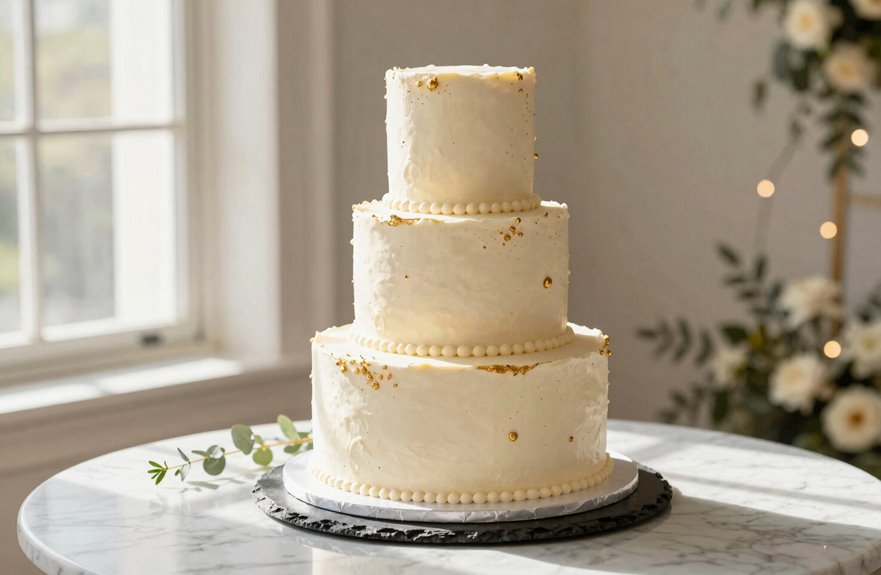
I typically start with standard 4-inch tiers, though many bakers are opting for 7–8 inch heights to achieve a modern, dramatic silhouette.
For a guest count of 50, those additional inches can effectively double your portions when you cut taller slices instead of widening them. I will explain how each height affects both the appearance and the calculations for your guest count.
Standard Tier Heights
Why does tier height matter? It shapes your serving portions and the overall presence of your tiered cake.
Let’s explore what works best for gatherings like ours.
Standard tiers stand 3-4 inches tall. This has specific implications for your celebration:
- Finger slices measure 1 x 1 x 4 inches; dessert slices are 2 x 1 x 4 inches.
- Round versus square dimensions affect servings significantly; a 10-inch round yields 36 servings, while the same square delivers 50-60.
- Combinations like 10″ + 8″ tiers serve 50 guests with balanced proportions.
When planning with friends, keep in mind that square cuts feed more people. You are considering dimension alongside height, ensuring everyone is included at your table without overwhelming your display.
Taller Modern Tiers
How dramatically do you want your cake to stand out? I’m drawn to taller tiers because they create that modern, architectural presence we see in our feeds right now.
At 7–8 inches, these double-height tiers transform your cake into something sculptural and bold.
Taller tiers change everything about servings. You’ll need to recalculate portions carefully to ensure your 50 guests don’t leave hungry.
I typically slice fewer, thicker pieces or balance one dramatic height with shorter companions below.
The real secret is to never guess. I always request a detailed cutting guide from my designer.
This document maps exactly how to portion each tier so your towering creation feeds everyone beautifully. With proper planning, you can serve both style and substance.
Standard 4-Inch Tiers vs. Modern 7-8 Inch Double Heights
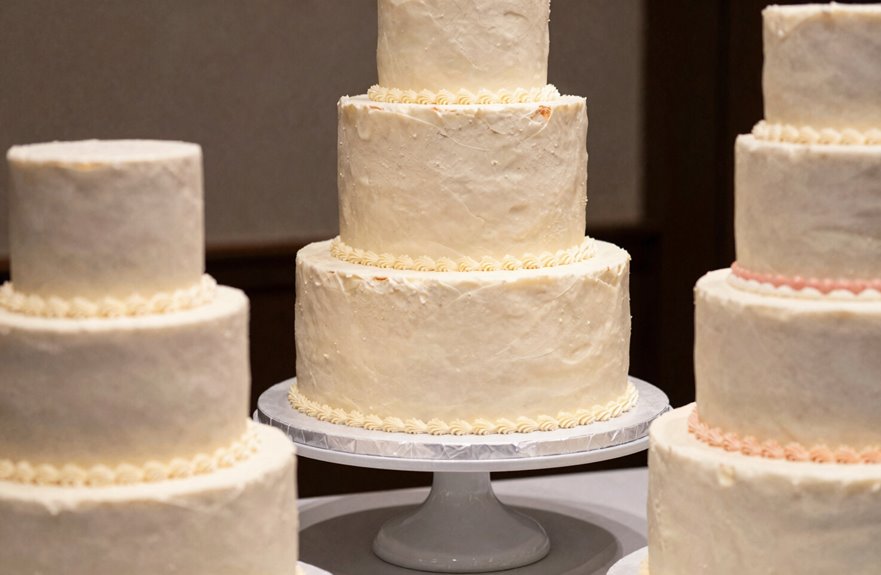
What’s the real difference between a cake that looks impressive and one that actually feeds your crowd? It comes down to tier height and how we slice the servings.
The real difference between a cake that looks impressive and one that actually feeds your crowd comes down to tier height and how we slice the servings.
A standard 4-inch tier serves roughly 12–18 guests for a 6-inch round, scaling up to 40–96 for larger squares. Modern designs introduce some changes:
- Double-height 7–8 inch tiers pack twice the cake without extra width.
- A sleek two-tier design using tall tiers provides fifty servings with a dramatic vertical presence.
- You still need 40–60 servings total, so factor in whether you’re cutting wedding portions or generous slices.
I prefer the taller silhouette when aiming for a striking visual without crowding the table. It feels contemporary, intentional, and perfectly suitable for your celebration.
Round or Square: Which Serves 50 Better?
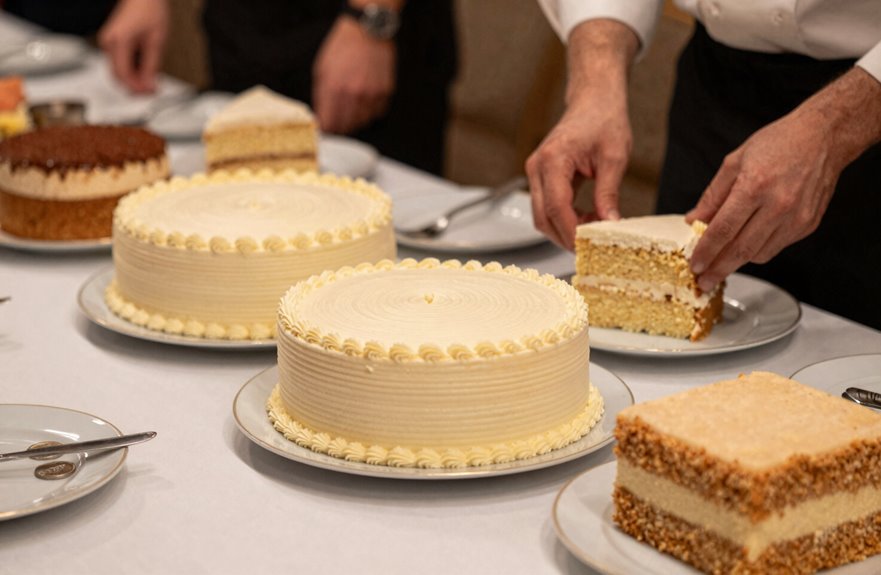
Now that we’ve settled on height, let’s tackle shape. I find round cake designs create a natural sense of togetherness that resonates with hosts who want everyone to feel included in the celebration.
When planning for fifty guests, tiered cake sizing becomes crucial. A single 10-inch round cake yields roughly 36 wedding-style serving portions, which is insufficient for our target.
Stacking is a practical solution; a 10-inch base paired with an 8-inch tier brings us comfortably into the 50–60 range.
Choosing round works in our favor. Slicing from the center outward provides clean, consistent pieces, ensuring no one receives a skimpy corner or awkward edge.
Every guest gets an equal share, reinforcing the sense of community that we aim to build together.
Two-Tier Round Cake: The Sweet Spot for 40-60 Guests
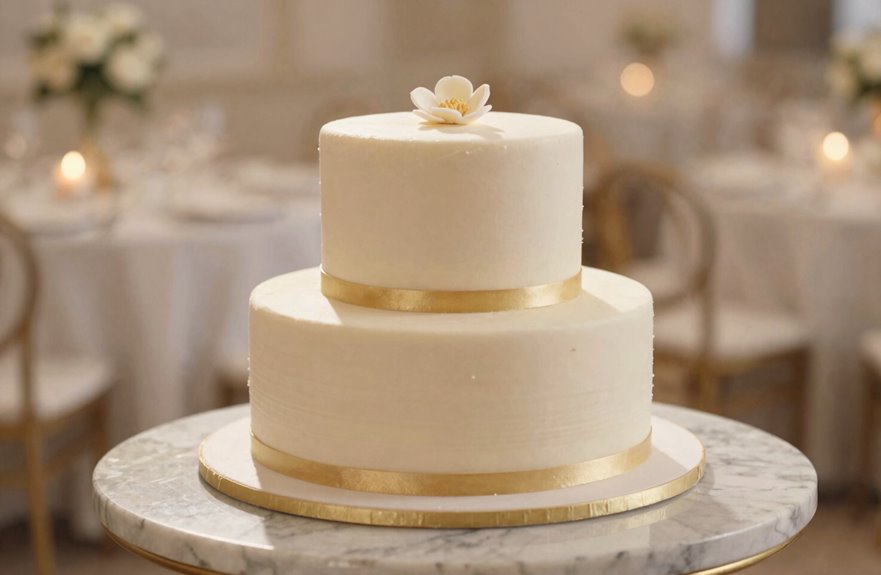
Why do I keep returning to the two-tier round cake? It strikes the ideal balance for gatherings of 40-60 guests, creating an intimate yet celebratory atmosphere.
The two-tier round cake: my constant choice for gatherings of 40-60, balancing intimacy with celebration.
When I plan tier sizes, I typically choose between these configurations:
- 8″ and 6″ tiers deliver roughly 40 servings for lighter celebrations.
- 10″ and 8″ tiers push closer to 60 servings when I’m expecting hearty appetites.
- 1 x 2 inch slices cut from center outward maximize my total servings without waste.
I ensure my top tier sits narrower than my base for a balanced silhouette in celebration photos.
Additionally, I keep a backup plan ready, whether that’s a discreet sheet cake or an expanded dessert table, to accommodate last-minute guests or dietary needs that may arise.
Two-Tier Square Cake: When You Want Larger Portions
How do square cakes manage to stretch further than their round counterparts? It’s all about geometry.
Square cakes eliminate curved edges, providing extra surface area for more generous wedding servings. When planning for fifty guests, a two-tier square cake becomes a reliable option for satisfying portion sizes.
Here’s what I’ve learned about balancing these tiers:
| Tier | Dimensions | Wedding Servings | Portion Size | Role in Design |
|---|---|---|---|---|
| Base | 10-inch square | ~60 | 1″ × 2″ | Foundation |
| Top | 8-inch square | ~32 | 1″ × 2″ | Visual accent |
| Combined | 10″ + 8″ | 50–60 | Standard cuts | Balanced centerpiece |
| Alternative | Finger portions | Requires more cake | Smaller cuts | Not recommended |
I always stick with standard wedding portions for accuracy. A 10-inch paired with an 8-inch two-tier square cake meets the target of 50–60 servings.
Every guest will have a proper slice in hand during your celebration.
Three-Tier Options for a Grander 50-Guest Presentation
A two-tier square cake handles the job well, and adding a third tier opens up more dramatic possibilities for your celebration. Presenting this stunning cake will make your event feel truly special for your guests.
For three-tier options that serve around fifty, I recommend these tier sizes:
- 5″, 7″, 9″ – yields roughly 50–60 servings with elegant proportions
- 6″, 8″, 10″ – provides 75–85 servings if you want generous leftovers
- Keep the top tier narrower for visual balance and height
Wedding servings use smaller 1″ x 2″ cuts to maximize portions across all tiers. This configuration transforms your dessert table into a centerpiece where everyone gathers.
Choose tier sizes that match your celebration’s energy.
Exact Servings Per Tier Combination for 50 Guests
I will walk you through two-tier configurations and how square versus round pans affect your yield. I will also discuss tall tier alternatives that can increase your serving count without adding width.
Two-Tier Configuration Options
Why settle for a single tier when a two-tier cake provides both visual impact and precise serving control? You can feel confident selecting the ideal two-tier configuration for your celebration.
Here’s how I break down my options:
- 10-inch and 8-inch tier cake: This serving size yields about 60 wedding portions, allowing for extra guests or generous cuts.
- 9-inch and 7-inch two-tier configuration: I get roughly 48–64 servings depending on my cutting style, offering flexibility and reliability.
- 9-inch and 6-inch combination: When targeting exactly 50 servings, this setup provides a range of 44–56 with smart portioning.
Each two-tier configuration allows for customization of the serving size to fit your crowd. Your cake will match your gathering perfectly.
Square Versus Round Yields
How do square and round cakes compare when aiming to serve 50 guests? The choice between square and round shapes is significant for achieving the desired number of servings.
Square cakes provide more servings from the same tiered cake sizes due to their corners, which add valuable surface area.
A combination of 6″ and 8″ round cakes yields approximately 32–40 wedding servings, so I would need to increase the size of the round cakes or opt for squares to meet the 50-guest target.
A three-tier round cake, such as 5″, 7″, and 9″, typically delivers 50–60 servings. Alternatively, pairing a 6″ round with a 10″ round results in around 40–50 servings, depending on the slice dimensions.
For planners focused on maximizing portions without overspending, choosing between square and round shapes can help. Serving smaller wedding slices—around 1 x 2 inches—allows for extending the tiered cake sizes and provides extra cake to share.
Tall Tier Alternatives
What combination of tall tiers should I choose when aiming to serve 50 guests with precision? Getting the cake size right creates memorable moments.
Here are my recommended options for tall tiers:
- 10″ + 8″ tiers provide 60 servings, offering a comfortable buffer when hosting.
- 8″ + 6″ tiers yield 42 servings, so I pair these with extra desserts for a sleeker presentation.
- 12″ + 8″ tiers deliver 50–60 servings, ideal for generous portions.
I cut straight center-to-edge for clean, even portions. With tiers at 7–8 inches tall, we double the standard height, enhancing visual impact while maintaining servings.
This approach ensures the celebration feels complete.
Adjust Your Count for Taller Cake Slices
Where should you start when taller cake slices catch your eye? Begin by checking how tier height changes your serving counts.
Taller slices typically measure 7–8 inches tall, nearly doubling standard tiers. This boosts visual impact but alters portions per tier, so adjusting your math is essential.
Taller slices mean fewer tiers are needed for a group of fifty guests. Each piece delivers more dessert, which is often appreciated.
For 50–60 servings, pairing one taller tier with a shorter companion tier balances abundance with beauty while ensuring everyone is satisfied.
Using serving guides designed for taller height tiers is important for accurate planning. Finally, confirming exact yields with your cake designer is crucial, as tier height shifts standard counts.
Getting this right ensures everyone receives their share.
Do You Need a Sheet Cake in the Kitchen?
A sheet cake in the kitchen provides flexibility when your tiered design falls short of feeding everyone. Smart wedding cake planning involves considering more than just the display piece.
When you’re hosting fifty guests or more, understanding why this backup is important can make a difference.
Here’s how a sheet cake simplifies your day:
- You slice it behind the scenes, keeping your main cake beautiful.
- You control servings precisely without guessing portion sizes.
- You cut costs while ensuring no guest leaves hungry.
I always plan my sheet cake servings alongside my tiered cake during wedding cake planning. This hidden helper allows you to focus on celebration rather than stress.
You’re not cutting corners; you’re joining savvy hosts who have discovered this strategy for generous entertaining.
Kitchen Cakes: The Secret to Simpler Tiers
How can you create a stunning tiered cake without the headache of complex construction? Kitchen cakes are the answer and are becoming our shared secret for stress-free celebrations.
When planning for fifty guests, I keep kitchen cakes as backup tiers hidden away until serving time. They allow me to design a beautiful centerpiece without the challenges of unstable layers.
I simply calculate how many servings my main cake provides and then supplement with kitchen cakes to cover the gap.
This approach offers flexibility without sacrificing style. I coordinate timing with my caterer to ensure everything flows seamlessly.
Whether hosting an intimate gathering or scaling up, kitchen cakes help us enjoy the moment without worrying about running short or compromising our vision.
Save Money Without Sacrificing the Look
Kitchen cakes solve the structural headache, and I’ve found another angle that keeps my budget in check. Smart tier sizing allows me to save money while still creating that memorable wow moment.
- Choose an 8″ and 6″ display cake for about 40 servings of visual impact; then add kitchen cakes backstage to reach 50–60 servings without anyone noticing.
- Opt for slightly smaller wedding cuts (1″ x 2″) rather than generous portions. This helps stretch servings while maintaining an elegant look.
- Reserve that top tier for my first anniversary instead of serving it, which reduces the tier sizing I need to purchase upfront.
These choices protect my wallet and my pride. Clever planning consistently leads to better financial outcomes, and my guests still feel part of something special.
When to Cut Your Cake: Timing Affects Size
When should I slice into the centerpiece I’ve so carefully planned? Cut timing shapes every serving decision I make.
If the cake stands alone as dessert, I plan generous portions—about 1 x 2 inches per wedding-style slice—and ensure I have enough for roughly 90% of my fifty guests.
However, if I’m offering multiple sweets at an evening reception, I shift to smaller finger portions, which changes my size calculations.
I always ask my designer for a serve-size guide that matches my specific shapes—round, square, or otherwise. Taller tiers do not increase servings per cut; they simply yield more slices from each tier.
This precision allows my catering team to portion accurately, ensuring every guest is included in the celebration without waste or shortage.
Save Your Top Tier for Your Anniversary
Why let tradition slip away when I can extend my celebration a full year? Saving the top tier for our anniversary connects me to countless couples who have savored this sweet ritual together.
Why let tradition slip away when I can extend my celebration a full year?
When planning my cake’s serving size, I will remember that keeping the top tier adds an extra layer to my total count.
I will coordinate with my designer to keep that top tier narrow and balanced so our cake looks stunning from every angle. Freezer concerns won’t deter me; even modern sponge cakes freeze beautifully with proper wrapping.
Here is how I will make it work:
- Wrap the cooled top tier in plastic, then foil, sealing tight against air
- Defrost gradually in the fridge before our anniversary toast
- Freeze a mini replica instead if I want fresh flavors that day
This tradition connects me to something timeless.
Get a Cutting Guide From Your Cake Maker
I need a clear roadmap from my cake maker that shows how to slice each tier to achieve fifty servings without guesswork. This cutting guide will be essential on the big day.
My cutting guide specifies how many servings each tier yields for my chosen shapes and heights. It maps recommended cuts—center-out for rounds, straight or diagonal lines for squares—ensuring every slice looks professional and consistent.
For fifty guests, my guide compares a 6″ + 8″ tier configuration against an 8″ + 10″ pairing, indicating which option provides the necessary 50–60 servings.
It also highlights smart adjustments, such as setting aside portions for guests with dietary restrictions or saving a few slices for anyone who wants seconds.
With this plan in hand, I am prepared to ensure my cake serves everyone seamlessly.
Brief Your Caterers on Portion Sizes
I’ll guide you through what your caterers need to know before they start cutting. It’s essential they understand the slice dimensions I expect, and I’ll provide them with the cutting guide from my cake designer.
Additionally, we need to confirm whether we’re serving plated slices or allowing guests to serve themselves. Locking in these details prevents shortages and maintains consistent portions for all fifty guests.
Communicate Slice Dimensions
How do you brief your caterer so every guest gets the right amount of cake? Clear communication about slice dimensions keeps everyone happy and avoids shortages.
I always share these essentials with my caterer:
- I specify whether we’re using wedding portions (1 x 2 inches) or party portions (1.5 x 2 inches), since this directly impacts serving yield.
- I confirm our cake shape and tier sizes, noting that square cakes offer more portions than rounds of equal width.
- I double-check if they’re supplementing with sheet cakes or mini desserts to reach our fifty-guest goal.
Provide Cutting Guides
Where should your caterer make the first cut? Let me show you how to protect your servings with effective cutting guides that ensure every guest feels included.
| Cake Size | Round Servings | Square Servings |
|---|---|---|
| 8″ | 20–24 | 28–32 |
| 10″ | 30–38 | 40–50 |
| 12″ | 40–50 | 55–65 |
I always provide my caterer with a diagram. For round tiers, I mark concentric circles to divide the cake into wedges, then score straight lines across.
For square cakes, I grid them into neat 1″ × 2″ rectangles—this eliminates guesswork and avoids awkward moments about who gets the larger piece.
My three-tier setup, such as 6″, 8″, and 10″, yields fifty servings. I share these cutting guides because your celebration deserves precision that makes every guest feel valued.
Confirm Serving Style
Why leave portions to chance when you’ve already planned the perfect cake? I always brief my caterers once I’ve locked in the serving style, ensuring we’re aligned before the big day.
- Clarify whether the cake stands alone or joins other desserts; this shapes your total servings and portion type.
- Specify dimensions: finger portions at 1″ x 1″ x 4″ versus standard slices at 1″ x 2″.
- Communicate tier-by-tier cuts and share guest count with your exact tier combination.
I learned that vague instructions lead to confusion. Now I confirm every detail, including dietary alternatives, so my serving style translates smoothly from plan to plate.
When caterers understand your vision, each of your fifty guests receives their perfect piece, allowing you to relax.
Double-Check Portions Match Your Event
When did you last count your guest list against your cake tiers? It might be time to check again, as this is often where things slip.
Nailing your portions starts with knowing your crowd. For fifty guests, I aim for 90% coverage—about forty-five servings—since some guests might skip cake for dietary reasons or leave early.
Your cake size should match your event’s vibe: wedding slices typically measure 1 x 2 inches, while dessert portions are 2 x 4 for those who want to indulge.
I always double-check my math. A 12″ round cake provides exactly fifty servings, but a three-tier combination of 6″, 8″, and 10″ yields fifty to sixty servings, which covers my bases.
Square tiers increase portion sizes without taking up too much space. You’ll have confidence knowing everyone will enjoy cake at the event.
How to Cut Round Cakes for 50 Guests
How do I turn a round cake into clean, even servings for fifty guests? Mastering portioning techniques is essential for successful round cake servings at gatherings.
Here’s what works for me:
- I combine an 8-inch and 10-inch tier, yielding about 62 wedding-sized portions—enough for everyone to feel included.
- I cut straight from center to edge, creating even wedges without messy leftovers.
- I stick to a 1 x 2 inch serving size, while accounting for extra guests since frosting and borders can shift actual yield slightly.
With these steps, everyone will be included. I always plan a small buffer or add a second dessert to ensure there’s enough for all guests.
How to Cut Square Cakes for 50 Guests
I’ll guide you through square tier selection, portion yield maximization, and cutting technique basics so you can serve 50 guests. When choosing square tiers, they yield more generous portions than round cakes.
An 8-inch square can cover 40 to 60 servings depending on slice size. To maximize yield, I prefer smaller wedding-style portions and cut straight edge-to-edge slices or work from the center outward for clean, consistent pieces.
Square Tier Selection
Why choose round when square tiers provide more cake? I’m opting for square tiers for my celebration because they maximize every inch of deliciousness.
For our group of fifty, I’ve identified the ideal wedding cake size that brings us all together.
My selection is guided by the following:
- I match square tiers to my headcount: a 6″ and 8″ combo or one filled 10″ layer delivers 50–60 servings without waste.
- I cut straight or diagonal for neat diamond portions, ensuring everyone receives an equal share in our moment.
- I plan for dietary needs and backup desserts so no one feels left out.
With 1″ x 2″ standard cuts, I’m making sure each guest feels included. Square tiers allow me to celebrate generously, ensuring that everyone can indulge.
Portion Yield Maximization
When serving fifty guests, precise cutting transforms every square tier into maximum yield. A square cake naturally outperforms round ones in efficiency.
My trusted 6-inch base provides 12 to 18 servings, while my 8-inch tier delivers 32 to 40 portions. Together, that’s roughly 50 to 60 servings, which aligns perfectly with my needs.
I plan my square cake combination carefully, pairing these two tiers to meet my target without over-purchasing. The geometry works in our favor; straight cuts or diagonal slices create uniform diamond portions that extend the servings more than expected.
If I still fall short on portions for fifty, I add a small sheet cake or a few cupcakes rather than an entire extra tier.
Cutting Technique Basics
Square cakes don’t maximize yield on their own; I need the right blade work to turn geometry into actual portions. Straight edge-to-edge square cuts transform a simple shape into reliable serving yield, ensuring everyone shares the same experience.
I aim for 1–2 inch wide slices, 4–5 inches tall—standard wedding portion sizes that feel generous without waste. I avoid curved or angled slicing; clean vertical cuts preserve neat edges and consistent counts.
I portion an 8–9 inch cake precisely for 50, or choose a 10 inch knowing I’ll exceed the target and have room to welcome unexpected friends.
Mastering these techniques ensures nobody gets shortchanged, allowing everyone to celebrate together.
Skip the Big Cake: Cupcakes and Other Alternatives
How can you serve 50 guests without wrestling a towering tiered cake into your venue? Cupcakes and donut towers create the same celebratory feel while keeping things wonderfully manageable.
You still give everyone their moment of sweetness, just without the structural stress.
A thoughtfully arranged dessert table allows guests to mingle and choose their favorites. When planning serving portions, ensure each person gets at least one treat, then add extras so friends can sample different flavors without guilt.
You can pair a simple single-tier cake with a cupcake tower to meet your guest count while keeping that traditional cutting photo. Coordinating your flavors and decorations makes your spread feel intentional, connected, and uniquely yours.
How Many Cupcakes for 50 Guests?
I’ll start with one cupcake per guest as my baseline. I’m considering how flavor variety and a tiered display will impact that number.
I’m factoring in extra cupcakes for guests who want seconds and for a small ceremonial cutting arrangement if I’m using a tower. Ultimately, I’m balancing simplicity, choice, and presentation to determine the final count.
Cupcake Count Basics
When planning a dessert spread for 50 guests, I order 55–60 cupcakes to account for second helpings and unexpected plus-ones. Getting the cupcake count right ensures everyone feels included; nobody wants to watch others enjoy dessert while being left empty-handed.
Here’s how I break it down:
- I plan one cupcake per guest as my baseline, then add 10–20% extra for a generous, welcoming vibe at celebrations.
- I remember that wedding servings differ from standard party portions, so a smaller portion size per cupcake works well for mixed dessert tables.
- I pair cupcakes with a simple cutting cake when I want visual impact without overspending on an elaborate tiered design.
Slightly overshooting the count is always better than running short.
Flavor Variety Planning
Once I have finalized my cupcake count, I focus on flavor variety. I want every guest to find something they love, so I plan for three to four distinct flavors in my dessert assortment.
This strategy allows me to balance classics like vanilla and chocolate with adventurous options like lemon lavender or salted caramel.
When I combine a main cake with cupcakes, I ensure my portion planning accounts for every serving. If my two-tier cake covers thirty-five guests, I will need fifteen cupcakes to reach fifty, with each one counted toward my total.
Flavor variety also involves considering dietary needs. I will include gluten-free or dairy-free options so everyone feels included.
By mapping my dessert assortment this way, I am catering to fifty people and providing choices that reflect their preferences.
Tiered Display Options
How can I make fifty servings feel grand without overwhelming my table? I use a tiered display to create height and intimacy, allowing us to gather around something beautiful together.
I match my cake size to my crowd. A 6″, 8″, and 10″ arrangement, or 5″, 7″, 9″, yields 50–60 wedding servings with standard slices.
Square tiers stretch further than rounds, so I ensure I’m never short.
- Stack three graduated tiers for vertical impact and easy portioning.
- Add a cupcake tower alongside, planning one per guest plus a few extras.
- Mix mini desserts and reduced cake portions so everyone finds something they love.
This approach keeps my spread abundant yet approachable. Fifty guests, fifty servings—no stress, just a celebration we share.
Pair a Small Cake With Cupcake Towers
Why choose between elegance and abundance when you can have both? Pairing a modest wedding cake size with cupcake towers allows us to celebrate together without anyone feeling left out.
A 6″ plus 8″ tier combination yields roughly 40–60 cake servings, depending on how we slice it. Adding a cupcake tower alongside brings the total to approximately 50–60 servings while maintaining an intimate and beautiful centerpiece.
Smaller wedding portions—about 2×1 inches—from the main tiers extend the cake further, and the cupcake towers provide consistent portions for guests to enjoy.
I always ensure that my total servings cover our headcount plus a few extra for unexpected friends or dietary needs.
Plan Donut Walls and Alternative Displays
Where else can we find that perfect balance of visual impact and practical portion control? Donut walls create a shared experience for our celebrations.
When planning these displays, I keep a few essentials in mind:
- I arrange 40–60 servings on my donut wall for 50 guests, giving everyone one donut plus tempting extras.
- I pair mini-desserts with a 6–8 inch cake to achieve 50–60 dessert portions without overwhelming plates.
- I include gluten-free and vegan options so every guest feels included.
I coordinate my display heights with the cake centerpiece to maintain visual harmony while managing servings per guest.
These alternative displays allow us to gather around something playful together, demonstrating that we don’t need giant cakes to create warm and welcoming moments.
Sizing Desserts When Cake Isn’t the Star
Donut walls and playful displays aren’t the only way to reimagine dessert service at smaller gatherings. Sometimes I want the cake present without dominating every plate, and smart cake sizing can redefine my approach.
For fifty guests, I select a two-tier design, perhaps 8″ and 6″, yielding roughly 35–40 wedding servings. This creates visual impact without overwhelming.
I round out my dessert planning with complementary treats to ensure I hit the target of 50–60 servings collectively. Square tiers help stretch portions further when every slice counts.
I keep the top tier narrow for elegance, then add a discreet sheet cake or alternative options backstage.
This way, the main cake remains picture-perfect, everyone leaves satisfied, and I join the ranks of hosts who balance beauty with genuine hospitality.
Balance Variety and Portions on Dessert Tables
How do I keep guests from hovering uncertainly over a dessert table? I lay out clear options that feel generous but not overwhelming.
For fifty guests, I don’t need one massive centerpiece; I build a spread where everyone finds something welcoming.
- A 6″ + 8″ + 10″ tiered cake yields 75–85 servings, perfect for a varied display with room to sample.
- A smaller 6″ + 8″ cake sits beautifully alongside mini treats, keeping the dessert table approachable.
- Square tiers stretch servings further than round ones, allowing me to offer more without crowding.
I mix cake size with supplementary bites so no one worries about taking too much. When guests feel included in the spread, they relax and enjoy.
This approach fosters an atmosphere where everyone is served, ensuring a comfortable experience for all.
Smaller Portions When Serving Multiple Desserts
When serving multiple desserts, I scale my cake portions down to finger-sized cuts or petite wedding slices so fifty guests can enjoy a taste without overspending.
I balance the dessert variety by treating cake as just one option among several, which allows me to use a smaller two-tier design or a single 6–8″ round while keeping everyone satisfied.
I always check with my cake designer to ensure these smaller cuts remain visually appealing on the plate and are well-distributed across the dessert table.
Portion Size Adjustments
Why stick to standard slices if you’re offering a full dessert spread? I’m adjusting my portion size to stretch my cake further when guests have plenty of sweet options.
I’m making tiered cake sizing work for my crowd by:
- Cutting finger portions (1 x 1 x 4 inches) instead of standard wedding slices, which nearly doubles my servings.
- Choosing square tiers over round ones since they yield more pieces from the same footprint.
- Pairing my 8″ + 6″ combo with mini desserts so I can serve 50 guests without upgrading tiers.
With 3-4 dessert pieces per person planned, I’m confident that everyone will be satisfied. Smart portion size adjustments allow me to create an abundant display without over-ordering cake.
Dessert Variety Balance
What happens when I explore options beyond cake? I scale down my portion size and highlight dessert variety.
I pair a modest two or three-tier cake with 3–4 mini treats per guest, such as brownies, macarons, cupcakes, and cookies, ensuring everyone feels included in the celebration.
My cake slices reduce to about 1 x 2 inches, or I cut 1–2 inch wide pieces if the tiers are tall. This approach allows me to extend servings while maintaining the spread’s appeal.
| Dessert Style | Slice Dimensions |
|---|---|
| Standard cake only | 1″ x 2″ x 4″ |
| Wedding multi-dessert | 1″ x 2″ x 4″ |
| Tall presentation cut | 1–2″ x 4–5″ |
| Mini dessert companion | 3–4 pieces/guest |
| Maximum stretch goal | 1″ x 1.5″ x 4″ |
I always consult my cake designer for a cutting guide tailored to my specific dessert variety lineup.
Guest Serving Strategy
I’ve balanced my dessert variety and am now focusing on how to serve my guests.
When multiple desserts are present, I’m reducing my cake servings to finger portions—these neat 1 x 1 x 4 inch slices—so everyone can mingle through the spread without missing out.
Here’s how I’m making it work:
- I’m sizing portions at roughly 1.5 x 2 inches when cake shares the spotlight.
- I’m counting my full dessert table—cookies, cupcakes, donuts—to allocate cake servings that allow guests to sample freely.
- I’m embracing finger portions as my go-to for dessert interactions that feel generous, not overwhelming.
This approach stretches my cake further while maintaining a welcoming gathering. Everyone leaves satisfied, and the table is designed for tasting together.
Account for Children’s Smaller Appetites
How do you adjust when half your guest list barely reaches the table? Scaling children’s portions alters wedding cake sizing for mixed-age crowds.
I trim kids’ cake servings to roughly half or two-thirds of an adult slice, about 1 x 1.5 inches instead of the standard 1 x 2 inches. This shift stretches my total servings without leaving anyone out.
I always reserve dedicated sections for younger guests so every child feels included in our celebration. When I have twenty kids among fifty guests, I don’t upsize the entire cake.
Instead, I supplement with dessert table extras that make children feel specially considered. I also communicate my child-friendly plan directly with my cake designer to ensure we balance appetites together within our fifty-serving target.
Order Extra for Photos (Then Eat It)
Even with children’s portions accounted for, I always pad my cake order by ten to fifteen percent for the photo ritual.
You’ve seen it too: the couple feeding each other, the proud slice shot, maybe a smear of frosting on a nose. That cake disappears fast.
I lean on a 10-by-8-inch tier combo for roughly fifty servings, but I add extra size so we don’t sacrifice real portions for pretty pictures. Here’s how I build that buffer:
- Order a larger tier than your headcount strictly demands
- Account for multiple photo setups before anyone takes a bite
- Remember that square cakes yield more servings and stretch further
Then we eat the evidence together. No waste, no stress, and everyone feels included in the celebration.
Reserve Slices for Vendors and Late Arrivals
Some guests will arrive after dinner, and your photographer, DJ, and coordinator deserve a slice too. I set aside 5–10% of my total cake servings specifically for vendor reservations and late arrivals.
For fifty guests, I plan fifty to sixty wedding-sized portions, ensuring everyone is included.
| Scenario | Cake Servings | Notes |
|---|---|---|
| Standard reception | 50–60 | Covers vendors and late arrivals |
| With dessert table | 45–55 | Balance with other sweets |
| Minimal staff | 50 | Adjust vendor reservations down |
| Large vendor team | 55–60 | Includes planner, photographers, caterers |
| Cake saved for couple | +2 extra | Communicate on serving guide |
I coordinate with my designer to designate backstage portions, keeping cuts consistent. Clear communication prevents last-minute shortfalls when cake runs low.
Plan Leftovers for Family or Freezing
Once I’ve accounted for vendors and late arrivals, I focus on what happens after the last slice is served. I plan for leftovers because shared moments extend beyond the celebration itself.
I want my circle to feel included in the joy, taking home memories they can savor later.
Shared moments extend beyond the celebration itself—let your circle take home joy they can savor later.
Here’s my approach:
- I ask my designer exactly how many servings to set aside before cutting, ensuring freezing happens at peak freshness.
- I embrace modern sponge cakes as freezer-friendly options, not just traditional fruit cake.
- I build distribution into my plan, whether for family gatherings or gifted portions, so nothing goes to waste.
When we celebrate together, thoughtful planning ensures everyone can enjoy the experience days later.
Freeze Your Top Tier for Year One
Why let the celebration end in a single day? I recommend freezing your top tier so you and your partner can relive the joy together on your first anniversary.
When planning cake size for fifty guests, I set aside the top tier separately from standard leftover servings. I choose a sturdy 6-inch or 8-inch tier; fruitcake or robust sponge works beautifully.
I wrap it tightly in multiple protective layers and seal it in a freezer-safe container. This keeps our tradition alive without sacrificing anyone’s slice at the reception.
I cool the cake completely first and then add that essential outer seal to block freezer burn. When our anniversary arrives, I move the frozen tier to the fridge for a day or two, then let it reach room temperature.
We’re enjoying more than cake; we’re experiencing our shared memories.
Adjust for Guest List Changes Before Final Order
How often does a guest list remain unchanged from the first draft to the final count? It rarely does, which is why I always build in flexibility with my tiered cake sizing.
Guest lists change. I always build flexibility into my tiered cake sizing from the start.
When my guest list shifts, I adjust strategically:
- Scale the largest tier upward first; moving from 6″ + 8″ to 8″ + 10″ adds servings without throwing off proportions.
- Confirm my final headcount and serving style with my designer before locking in the order.
- Bump to 60 servings or add backup desserts when I want leftovers or anticipate last-minute plus-ones.
I have found that 50–60 servings covers most fluctuations comfortably. Whether I’m choosing finger portions or traditional slices, I ensure my tiered cake sizing reflects the actual guest count.
Confirm Final Numbers With Your Venue and Caterer
I always double-check my venue’s maximum capacity before finalizing a cake size, as that number determines my limit regardless of how many guests I’ve invited.
I then coordinate with my caterer about when they’ll need the final headcount, since their deadline usually comes before the baker’s.
Ensuring both confirmations on the same day keeps my guest count consistent across all vendors, preventing any mismatches between my cake order and the venue’s capacity or meal service.
Venue Capacity Check
Where will everyone sit, and how will the cake fit into the space? I always check venue capacity first because it shapes every decision that follows.
You’re planning this celebration together, and matching your guest headcount to the layout helps maintain an intimate atmosphere.
- Confirm your final numbers with the venue so cake servings align with the actual attendees.
- Match your cake style to the room’s flow; single tier, multi-tier, or sheet cake each occupy space differently.
- Request exact dimensions for the cake table to avoid last-minute adjustments.
I typically recommend a 10″ and 8″ two-tier or 6″ and 8″ pair for 50 guests, yielding 40–60 cake servings depending on cut size. I add a 5–10% margin when finalizing with the venue and baker to ensure your gathering remains welcoming.
Caterer Coordination Timing
When should you loop in your caterer to lock down the final headcount? I recommend reaching out seven to ten days before your event, once your RSVPs are confirmed.
This caterer coordination ensures we aren’t scrambling to adjust portions or tier sizes at the last minute.
I always share the designer’s serve-size guide with my caterer so they understand how my chosen shape translates to slices.
We align on delivery timing, whether the cake arrives whole for on-site cutting or pre-sliced for seamless service, and finalize the serving plan together.
Here’s my coordination checklist:
| Task | Deadline | Contact |
|---|---|---|
| Confirm final guest count | 10 days out | Venue & caterer |
| Share dietary restrictions | 10 days out | Caterer |
| Review serve-size guide | 7 days out | Baker & caterer |
| Lock in delivery timing | 5 days out | Caterer |
| Final coordination call | 3 days out | All vendors |
I also schedule one last call to confirm cut style and serving timing. When we are aligned, the process runs smoothly.
What to Bring to Your Cake Consultation
Why walk into your cake consultation unprepared and leave disappointed? I always arrive ready so my baker and I can effectively discuss servings and tier sizes.
Here’s what I bring to feel included in the planning process:
- My guest count written down, as knowing I need exactly fifty servings influences every decision about tier sizes.
- Photos of styles I love, particularly narrow tops with balanced bases, such as a taller 10” paired with 8”, or 8” with 6” for that tight aesthetic.
- Notes on portion preferences, since I’ve learned that “dessert” slices (2” x 1” x 4”) serve fewer people than “finger” portions (1” x 1” x 4”).
With these details prepared, I enter confidently. We are collaborating, not guessing.
Check Their Portfolio for Size References
I’ve prepared my consultation materials, but I need to verify that my baker can create the right proportions for fifty guests. Portfolio references are essential in this process.
I request photos with specific cake tier sizes noted; diameters and heights are crucial when planning for my crowd. I look for serving counts attached to each design, especially configurations like 5″/7″/9″ or 6″/8″/10″ that typically feed around fifty people.
I also check whether portions are finger slices or dessert cuts, as this significantly affects the serving size.
I use these visuals to align my preferred shape—round or square—with my guest total.
When I find cakes similar to my vision with clear size markers, I feel reassured that we are on the right track toward creating something suitable.
Taste Test for Flavor and Portion Size
How do you know a cake suits fifty guests until you’ve tasted it yourself? I always schedule a tasting to evaluate both flavor and serving size before finalizing my order.
Getting the portion control right means understanding what I’m actually serving. During tastings, I pay attention to these essentials:
- Serving size: I compare finger portions (1″ x 2″) versus dessert portions (2″ x 2″) to see what satisfies my crowd.
- Tier combinations: I test how different tier combinations like 6″, 8″, and 10″ actually slice and present.
- Shape impact: I notice that square tiers provide more even portions than round ones.
I’ve learned that popular tier combinations for 50–60 guests include 10″ + 8″ setups or three-tier arrangements. This hands-on approach ensures my cake feeds everyone properly without waste.
Get Your Cake Size Quote in Writing
Once I’ve settled on flavors and portions at the tasting, I move straight to locking down the details. I always request a written quote that clearly states how many servings I’m getting and what tier sizing delivers them.
Here’s how I compare my options:
| Tier Combo | Shape | Servings | Best For |
|---|---|---|---|
| 8″ + 10″ | Round | 50–60 | Standard dessert |
| 6″ + 8″ + 10″ | Round | 75–85 | Extra guests or leftovers |
| 6″ + 8″ | Round | 30–40 | Too small for 50 |
| 8″ + 10″ | Square | 60–70 | Maximum yield |
| 6″ + 8″ + 10″ | Square | 90–100 | Generous backup |
I ensure my written quote includes any holdback for leftovers so my tier sizing accounts for every slice. This approach prevents any surprises or shortfalls, providing a clear understanding of what to expect.
Cake Stand Size for Stable Display
Choosing a stable cake stand is essential for a successful display. First, match the stand’s diameter to the bottom tier, typically a 9-inch base for a three-tier cake serving 50 guests.
This ensures there is no overhang that could lead to tipping. Next, verify that each ascending tier rests fully on the one below it.
This configuration maintains a stable center of gravity, ensuring everything remains upright from setup to the last slice.
Stand Diameter Selection
Stand Diameter Selection
Why does stand diameter matter? I want your cake to stand tall and proud, not wobble through the celebration.
The right stand diameter ensures your fifty-guest centerpiece remains secure from setup to the last dance.
When planning for 50–60 servings, I always match my stand diameter to my widest tier plus two inches of clearance. This creates a professional, balanced look.
Here’s what I prioritize:
- Stability first; a wider base prevents tipping, especially with height.
- Clearance around edges; at least two inches keeps tiers visually grounded.
- Proportion to servings; scale the stand to support your guest count elegantly.
I always consult with my cake designer when uncertain. Together, we will determine the stand diameter that ensures your celebration feels cohesive, safe, and stunning.
Tier Width Matching
How do you keep a multi-tier cake from looking top-heavy or unstable? I match tier width to my cake stand for balanced, secure display.
For 50 guests, I use standard serving guides: a 6-inch tier yields 12 servings, an 8-inch tier provides 24, and a 10-inch tier offers 36. Combining tiers can help reach my target; for example, I might use 6″, 8″, and 10″ for roughly 50–60 servings.
Square cakes typically yield more portions per tier than round cakes, so I can downsize my cake size while still accommodating everyone.
I ensure each tier width steps down gradually to prevent wobbling and create visual harmony. Wider tiers require sturdier supports, so I plan my stand accordingly.
If I include cupcakes or mini desserts on my table, I will reduce the size of my main tiers—perhaps just 6″ and 8″—and allow the extras to make up the difference.
Fondant or Buttercream: Does It Affect Sizing?
The choice between fondant and buttercream won’t change how many guests your cake can feed, but it does influence what I’m putting on the plate.
When planning cake servings for your celebration, I use standard tier dimensions and cut sizes regardless of frosting finish. Both options deliver the same portion size if I slice consistently.
Fondant requires a sturdier cake core underneath, which can slightly affect how I yield each tier. Buttercream’s softer edge and decorative borders add frosting weight without altering the serving math.
I calculate using standard guides first and then adjust only if extra frosting layers change slice height.
Your frosting finish shapes the experience without impacting the guest count. I will ensure everyone gets their perfect slice.
Will Heavy Decorations Affect Your Cake Size?
You’ve settled on your frosting finish, but now you’re wondering what happens when you start stacking on elaborate sugar flowers, cascading fondant ribbons, or that oversized topper you love. Decorating impact directly affects your tiers.
Heavy pieces demand thicker frosting support and extra structure, which reduces interior cake volume.
When planning cake portions for fifty guests, it’s important to factor this in early. Intricate borders and dense toppers mean you’ll need larger tier sizing—perhaps upgrading from 8″+6″ to 10″+8″—to maintain those fifty servings without sacrificing stability.
Always discuss weight and density with your designer upfront to avoid a leaning masterpiece or skimpy slices at the celebration you’ve worked hard to perfect together.
Delivery Timing and Setup Logistics
I will guide you through how to secure optimal delivery windows, confirm setup space requirements, and establish temperature control protocols. This ensures your fifty-guest cake arrives intact and remains fresh until cutting time.
Optimal Delivery Windows
When should your cake actually arrive? I recommend aiming for 2–4 hours before your event starts.
This delivery timing allows for on-site placement and any final tweaks without the rush.
Here’s what works best for our celebration:
- Coordinate with your designer and venue to ensure we are aligned on access and refrigeration needs.
- Confirm who is handling setup, where the cake will go, and whether any special staging applies.
- Designate a clear contact person and establish a solid contingency plan for delays or last-minute changes.
I always schedule a quick handoff briefing between the baker, venue staff, and coordinator. This keeps us connected and ensures nothing is overlooked.
Having a backup plan is essential for effective event management.
Setup Space Needs
Timing your delivery is only part of the equation. I focus on where the cake is going and what it will take to get it there.
I measure the designated table to confirm my setup space accommodates the cake size I’ve chosen for fifty guest servings, plus clearance for tiered stands, the knife, server, and cutting guide.
I check height and width against surrounding décor, accounting for props or toppers that need extra vertical room. I confirm with the venue if weight limits or elevator dimensions restrict what I can bring through; stairs change everything.
I map the route from my vehicle to the display area, ensuring protective packaging fits doorways and turns. Getting this right ensures a smooth celebration for everyone involved.
Temperature Control Protocols
How do I keep a buttercream cake pristine from my door to yours? It starts with temperature control I maintain from the moment your cake leaves my kitchen.
I schedule delivery within a tight 2–4 hour window before service, sending your cake only when conditions protect frosting stability. I safeguard your centerpiece in the following ways:
- I verify pre-transport temperatures and maintain 68–72°F using insulated carriers or climate-controlled vehicles for the journey.
- I route around heat, humidity, and direct sun, choosing cooler delivery times and shaded setup zones.
- I arrive prepared with contingency tools for quick touch-ups, ensuring any minor shifts are corrected before your guests arrive.
Your celebration deserves cake that looks as incredible as it tastes. I have established protocols to ensure every detail is protected.
Pack a Cake Emergency Kit for the Venue
Even the most meticulously planned cake can face surprises at the venue, so I always pack an emergency kit before heading out. I have learned that tier combinations chosen for fifty servings still need backup support if accidents happen.
My emergency kit holds spare frosting for quick repairs, extra dowels for stabilizing tall tiers, and a small offset spatula for smoothing smudges.
I also tuck in clean serving utensils and a cake-cutting guide showing 1 x 2 inch portions, since precise slices stretch servings when guest counts shift unexpectedly. When I select a 5″, 7″, and 9″ combination, this kit protects those carefully calculated servings.
With this preparation, we can ensure every slice counts for the celebration.
How Cake Size Affects Your Cutting Ceremony Photos
Once I have secured my emergency kit at the venue, I focus on how the cake will look when you and your partner make that first cut together.
Emergency kit secured, my attention shifts to the moment you and your partner make that first cut together—capturing how your cake will look in photographs.
Your cake servings directly shape your photo presentation. With fifty guests, I am choosing a 6″ and 8″ tier combo yielding 30–40 servings, which allows the tiers to remain full for post-cutter shots.
Your cutting style matters too; center-to-edge slices create symmetry, while straight cuts highlight geometric precision that you will want captured.
- Narrower top tiers photograph elegantly against wider bases.
- Offset heights add drama without overwhelming your silhouette.
- Smaller wedding portions preserve intact tiers for more photo moments.
I will stage you with the 8″ tier forward to ensure your photo presentation feels balanced and intimate. This way, you will have images that reflect your unique celebration rather than generic wedding album photos.
Common Cake Sizing Mistakes for 50-Guest Weddings
I’ve seen couples choose tier ratios that disrupt both portion sizes and aesthetics, such as stacking an 8″ over a 10″ without a smaller top tier, resulting in a squat centerpiece that lacks visual appeal.
Additionally, dietary needs can be overlooked; guests with gluten intolerances or vegan preferences often receive insufficient options when only the standard slice is planned.
These oversights can negatively impact your dessert table, but I will address them before your baker begins mixing batter.
Wrong Tier Ratios
How often have you spotted a wedding cake that looks top-heavy or oddly squat? This often happens at weddings where tier ratios weren’t planned with care, which can throw off the whole aesthetic.
Getting tier ratios right ensures your cake looks balanced and delivers proper wedding cake portions. Here are key points to consider:
- An 8″ and 4″ combo looks disproportionate and won’t feed fifty guests comfortably.
- A 10″ plus 8″ pair yields 50–60 servings but risks visual imbalance if the top narrows too sharply.
- Adding a third tier (6″ + 8″ + 10″) often creates excess servings or awkward proportions for this guest count.
It is important to match serving size to event style; dessert portions differ from finger slices. This approach helps ensure every guest is served without waste or shortage.
Overlooking Dietary Needs
Where do you begin when half your guest list might not touch a standard buttercream cake? Overlooking dietary needs can derail your entire celebration.
When you’re portion planning for fifty guests, remember that vegan or gluten-free requirements reduce your available servings significantly. You don’t want anyone feeling excluded from this shared moment.
| Dietary Need | Portion Solution |
|---|---|
| Vegan guests | Dedicated 6″ tier |
| Gluten-free | 8-10 specialty slices |
| Multiple restrictions | Second dessert option |
| Backup portions | 5-10 extra servings |
I always coordinate with my cake designer to confirm exact counts. Dietary needs are essential to creating a welcoming table where every guest belongs.
Planning a few dedicated portions prevents awkward gaps and keeps everyone celebrating together.
Final Checklist: Ordering Cake for 50 Guests
When finalizing a cake order for 50 guests, I always run through a quick checklist to avoid any last-minute surprises.
I confirm my servings first. Wedding portions run 1″ x 2″, so I’m calculating precisely.
I lock in my cake size next, comparing single-tier versus tiered options. For 50, an 8″ + 6″ two-tier arrangement hits that sweet spot of 40–60 servings while looking celebration-ready.
Here’s what I double-check:
- Confirming tier dimensions and total yield with my baker.
- Verifying cutting style matches my serving goals.
- Having a backup plan for 5–10 extra slices.
A 10″ single or that 8″/6″ combo ensures our gathering is covered without waste. Getting these details right allows everyone to celebrate together without concerns.